
Are you ready to transform that dark, unused basement into a functional living space? Imagine the possibilities: a cozy family room, a home office, or even a personal gym. In this step-by-step guide, we will walk you through the entire process of DIY basement finishing, from planning and design to adding the perfect finishing touches. Let’s get started on creating the basement of your dreams!
Short Summary
Prepare your basement for a successful and long-lasting renovation project!
Transform it into an inviting living space with the right materials, insulation & drywall installation.
Add finishing touches such as waterproof paint or masonry paint, flooring installation services & electrical components to brighten up the area.
Preparing Your Basement for Finishing

Before diving into the exciting world of basement renovation, it’s crucial to prepare the space properly for a basement remodel. A well-prepared basement will ensure a successful and long-lasting finished result.
Why spend time and resources on a beautiful renovation if moisture or structural issues will ruin your hard work?
Cleaning and Decluttering
First things first, let’s tackle the clutter. An organized basement is not only a more pleasant work environment, but it also allows you to assess the space better and spot any potential issues. Remove any damaged items and give your basement a thorough cleaning.
Disinfect and scrub the walls and concrete floor, so you have a clean slate to work with. Remember, transforming your basement into a functional living space begins with a clean and clutter-free area.
Moisture Testing and Leak Repair
Now that your basement is clean and organized, it’s time to address any moisture concerns. To do this, conduct a moisture test by taping a 2-ft. square sheet of plastic to the masonry. Moisture starts to collect on the backside of the wall after a few days. This indicates that there is water wicking through the foundation wall from outside. It’s essential to fix any leaks or dampness issues before starting the finishing process to prevent future damage or mold growth.
Here are some solutions for resolving damp basements:
Install a dehumidifier.
Install a sump pump.
Take measures with full basement waterproofing.
Consider rerouting downspouts and regrading slopes away from foundation walls.
Apply water-resistant paints to interior surfaces.
Hire a professional to install perimeter drains and a sump pump for more severe issues.
Assessing Structural Integrity
Finally, assess the structural integrity of your basement’s walls, floors, and ceilings. Look out for cracks in the foundation walls, bulging or bowing walls, and difficulty opening or closing doors and windows, as these could be signs of structural issues.
Addressing any structural concerns before beginning the renovation will ensure your finished basement is not only beautiful, but also safe and long-lasting.
Planning and Designing Your Finished Basement
With your basement prepared, it’s time to plan and design your dream space. A well-designed basement considers functionality, layout, and compliance with local building codes and permits. As you plan, think about how you want to use the space. Will it be a home theater, a playroom for the kids, or a guest suite?
The possibilities are endless!
Functionality and Layout
When planning the layout, assess the available space and determine its intended use. Take into account any design obstacles or challenges, such as limited space or structural issues, and use them as opportunities to get creative with your design. Set a budget for your project and ensure proper waterproofing and drainage to avoid future issues.
With a clear vision and a well-thought-out layout, your unfinished basement will be one step closer to becoming a functional living space.
Building Codes and Permits
Before starting any construction, research your local building codes and obtain the necessary permits to ensure your basement renovation complies with regulations. This is crucial to avoid potential fines or issues when selling your home in the future.
Common building code requirements for basements include emergency escape and rescue openings, insulation, and minimum ceiling height. By adhering to local building codes and obtaining the required permits, you can confidently move forward with your basement renovation project.
Selecting and Gathering Materials
With your design in place, it’s time to gather the materials you’ll need for your basement finishing project. This includes:
screws
plywood
nails
insulation
a caulk gun
circular saw
hammer
gloves
goggles
insulation adhesive
Be sure to use treated wood if it will come into contact with concrete, and consider using concrete screws along with special building materials designed for basements to resist moisture.
Having the right materials on hand will ensure a smooth and successful renovation.
Insulation and Drywall
When choosing insulation and drywall materials, consider moisture resistance, cost, quality, and ease of installation. Rigid foam board insulation is a popular choice for basement walls due to its moisture resistance and cost-effectiveness. Closed-cell spray foam is another great option for insulating concrete basement walls. Spray foam, fiberglass, and foam board are the most commonly used insulation materials for basement finishing projects.
For drywall installation, follow these steps:
Measure and cut the drywall to fit the space perfectly.
Attach the drywall to the wall studs using drywall screws.
Seal the seams with joint compound and tape for a professional look.
By choosing the right insulation and drywall materials, you’ll create a comfortable and energy-efficient basement space.
Flooring and Ceiling Options
When selecting basement floors and ceiling options for your finished basement, consider the intended use and aesthetic of the space. Waterproof or water-resistant flooring options, such as carpet and laminate, are ideal for basements to protect against potential damage from floods or leaks.
For ceilings, consider drywall, drop ceilings, and acoustic tiles to achieve the desired look and functionality. By exploring various options, you’ll find the best fit for your basement’s intended use and design.
Framing Your Basement
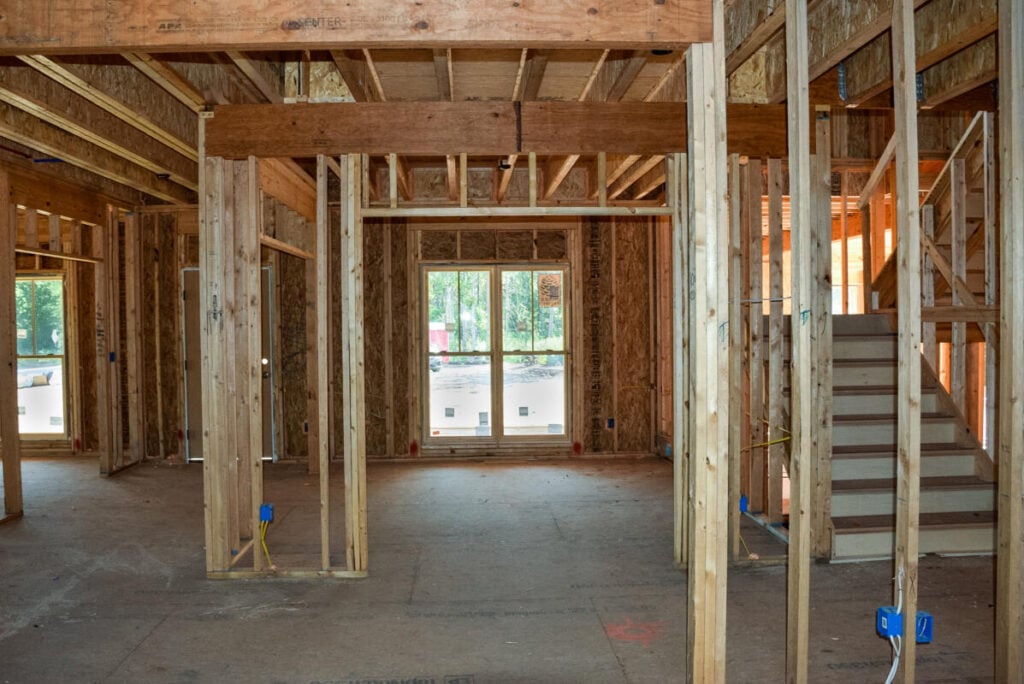
Now that you’ve gathered your materials, it’s time to frame your basement. Framing is essential for creating a solid foundation for the finishing process. Properly framing the walls, floors, and ceilings will ensure a sturdy and long-lasting result.
Wall Framing
To construct wall framing, follow these steps:
Cut all two-by-fours to the correct length.
Start building your wall by placing wall joists every 16 inches on center.
Install the top and bottom plates first.
Secure the wall joists for a strong and stable wall frame.
This will provide the necessary support for insulation, drywall, and other finishing materials.
Floor Framing
For the basement floor, framing provides a level surface for flooring installation. Secure the bottom plate to the floor joists using nails or screws for a fast and reliable result. To ensure proper plumb up, place a straight stud against the bottom plate and use a level to confirm it is perfectly vertical.
Once the bottom plate is secured, begin installing the wall studs. Start at one corner.
Ceiling Framing
Framing the ceiling is essential for concealing ductwork, plumbing, and electrical components while maintaining accessibility. If you’ve chosen a drywall ceiling, use a drywall jack or enlist an extra set of hands to help out.
For a drop ceiling, install the installation kit according to the manufacturer’s instructions. By properly framing the ceiling, you’ll create a neat and organized look in your finished basement.
Insulating and Installing Drywall
With your basement framed, it’s time to insulate and install drywall to create a comfortable, energy-efficient space. Proper insulation will improve thermal performance and reduce energy costs.
Installing drywall provides a smooth, finished surface for painting and decorating.
Insulation Installation
Install insulation materials, such as rigid foam board, polystyrene foam insulation, or spray polyurethane foam, to ensure maximum energy efficiency and comfort. For best results, follow the manufacturer’s instructions for installation.
Proper insulation will not only improve thermal performance but also reduce energy costs in your finished basement.
Drywall Installation
Hang drywall on framed walls, floors, and ceilings to create a smooth, finished surface for painting and decorating. Measure and cut the drywall to fit the space perfectly, and securely attach the drywall to the wall studs using drywall screws.
Finally, use joint compound and tape to seal the seams and finish the drywall for a professional look.
Finishing Touches
With your basement insulated and drywalled, you’re almost there! Now it’s time to add the finishing touches that will make your basement a welcoming and visually appealing space. The final steps include:
Painting
Flooring installation
Lighting installation
Electrical component installation
These final touches will bring your vision to life.
Painting and Decorating

Paint and decorate your finished basement to create an inviting and visually appealing space. Clean the walls thoroughly and check for any water damage, leakage, moisture, or mold before starting the painting process. Apply one coat of primer followed by two coats of paint, allowing the walls to dry in between coats.
Waterproof paint or masonry paint will ensure your basement wall and other basement walls are durable and well-protected.
Flooring Installation
Install your chosen flooring material to complete the look and feel of your basement. Waterproof vinyl flooring is an excellent choice for a basement due to its durability and waterproof nature.
To ensure a successful installation, first install a new subfloor using plywood and polystyrene sheets or a moisture barrier.
Lighting and Electrical
Install lighting and electrical components to ensure your finished basement is well-lit and functional. Select appropriate fixtures and bulb sizes, and make sure to follow safety guidelines when installing lights and electrical outlets.
Proper lighting will enhance the overall ambiance of your basement, making it an enjoyable space for you and your family to spend time in.
Summary
In summary, finishing your basement is a rewarding project that adds valuable living space to your home. By following this step-by-step guide, you can transform your basement from an unfinished space into a functional and inviting area. From preparing the space and planning the layout to installing insulation, drywall, and flooring, each step contributes to creating a beautiful and comfortable basement that your family will enjoy for years to come. So why wait? Start your basement renovation journey today and unlock the potential of your home’s hidden gem.
Frequently Asked Questions
Can you finish a basement yourself?
Yes, with the right knowledge, materials, and tools, you can absolutely finish a basement yourself! With patience, a reasonable budget and some good tips from home renovation professionals, you can turn your basement into a functional and stylish space.
Whether you choose to take on the project yourself or hire a professional is up to you! May 21, 2021.
Is it cheaper to finish a basement yourself?
Finishing a basement yourself is generally a more cost-effective option, as you won’t have to pay for labor costs or expensive materials.
Taking on the job of DIYing your basement will help save money that can be better used to invest in quality materials.
What is the cheapest way to finish basement walls?
The most cost-effective way to finish a basement wall is by using drywall and then painting it. To make this project more affordable, you can use the cheapest drywall and apply a coat of primer before adding the paint of your choice.
What is the best material for finishing basement walls?
Drywall is the best choice for finishing a basement. This material is relatively inexpensive, easy to install, and fire-resistant.
To ensure optimal results, make sure you use high-quality drywall tape to prevent moisture buildup, molds, and to fire- and soundproof the area.
Can you build a basement by yourself?
Building a basement by yourself can be a rewarding experience if you have the right skills and tools. You can save money on labor costs, customize your project to fit your exact needs, and manage the timeline at your own pace.
So if you’re ready for a challenge, why not give it a try?